Running a Simulation#
Now, it is finally time to run an EMBRS simulation. In order to do this you need an EMBRS map.
Step 1: Open the Simulator Tool#
Run the following command in your terminal.
run_embrs_sim
After running this command you should now see the following window:
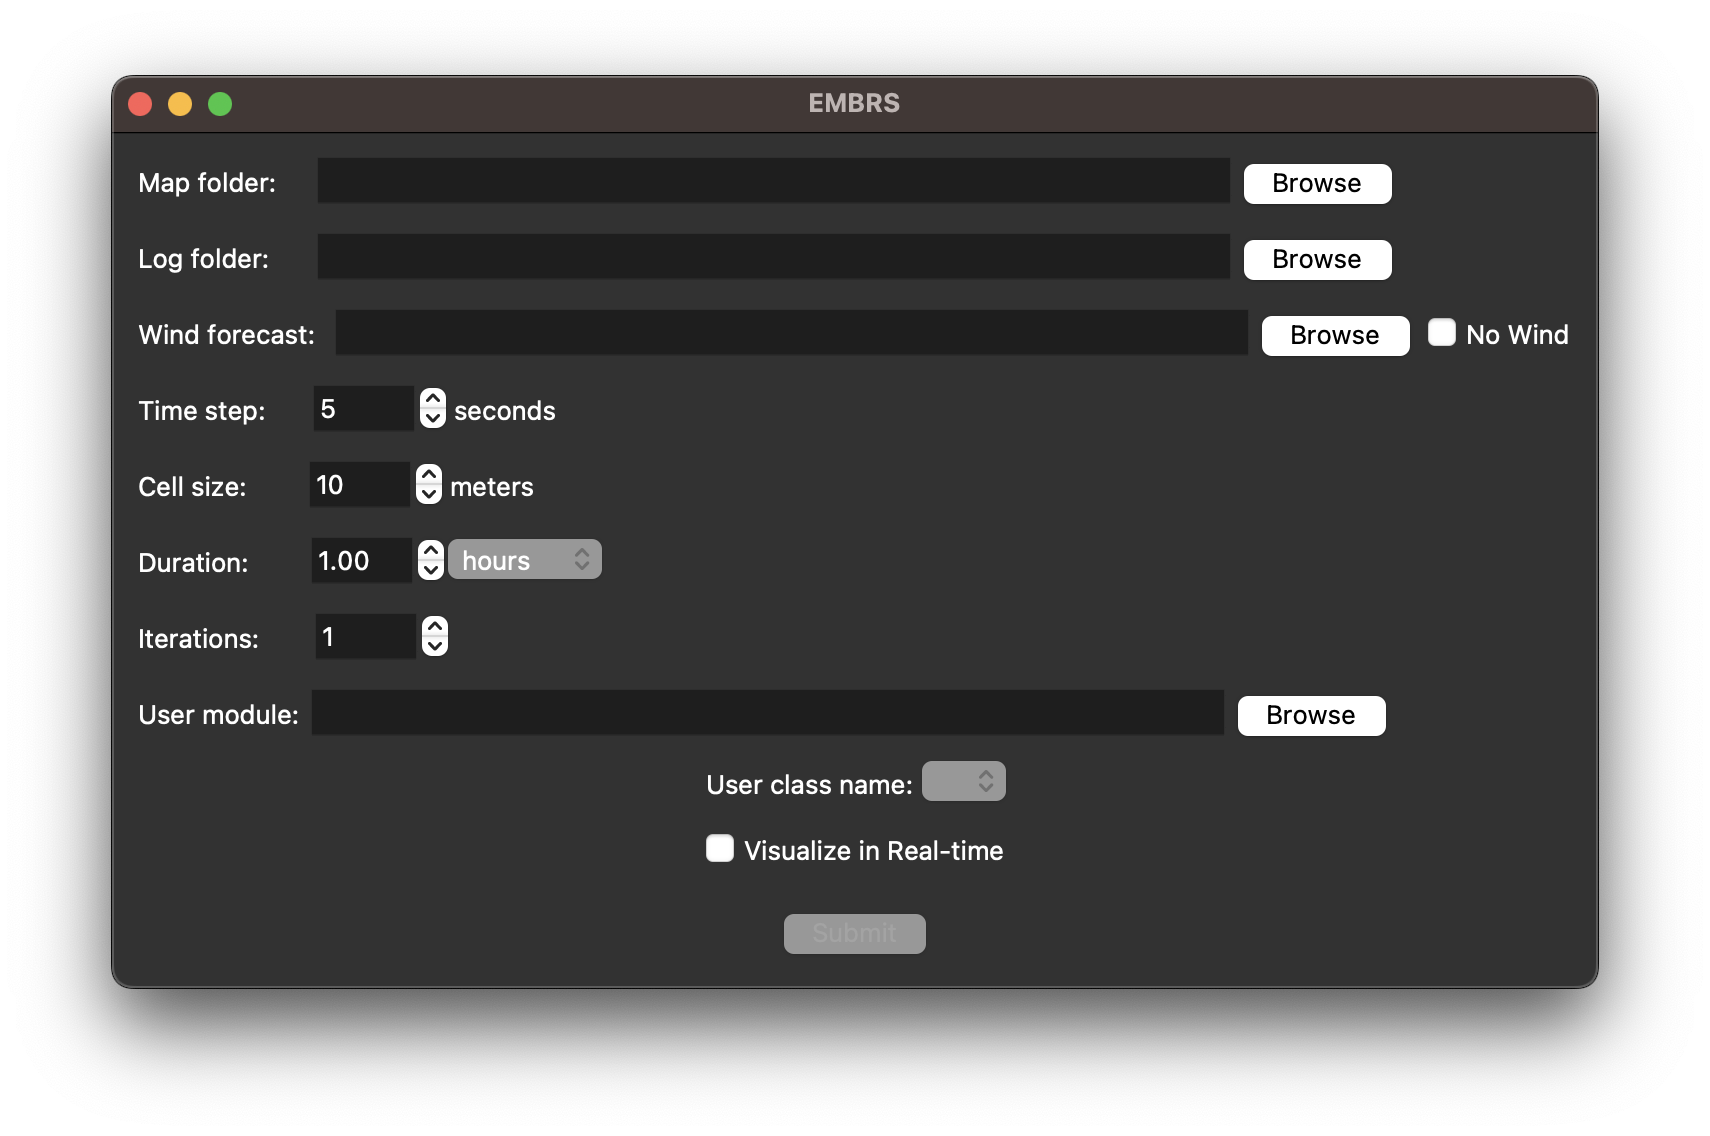
This window is where you specify all the input parameters for your EMBRS sim.
Step 2: Select Input Parameters#
Map Folder#
The first field in the window prompts you for the location of a map folder.
Click ‘Browse’ and navigate to the folder containing all the files for your desired map.
Log Folder#
The next field prompts you for a location to save all the log files for the sims you are running.
The log files store the results of your sims and will allow you to reconstruct them.
More info on log files in the next section
Click ‘Browse’ and navigate to the folder where you would like to save logs for the current sim.
Note
If you select a folder that already has logged data in it, those logs will be overwritten when you run the simulator.
Wind Forecast#
The next field prompts you for a location of a wind forecast.
Click ‘Browse’ and navigate to the .json file containing the desired wind forecast.
Select ‘No Wind’ if you would like to run a sim in the absence of wind.
Time Step#
The next field prompts you to specify a time step in seconds for the simulation.
This dictates how much time passes between iterations of the fire simulation.
It is recommended to set a time step between 1 and 30 seconds.
Cell Size#
The next field prompts you to specify a cell size in meters for the simulation.
This dictates the size of the hexagons that are overlayed on the map. Cell size is measured as the length of one side of a hexagonal cell.
The smaller the cell size the more finely detailed the sim will be, but small cells will also limit the speed of the simulation. It is recommended to use a cell size between 5 and 20 meters.
Duration#
The next field prompts you to specify a duration for the simulation.
This dictates how much sim time the sim will run for before terminating.
You have the option of specifying the duration in hours, minutes, or seconds.
The duration of your sim is limited by the length of the wind forecast selected.
Note
The simulation will end early if there are no more cells on fire, otherwise it will run for the specified duration.
Iterations#
The next field prompts you to specify the number of iterations to run.
This field determines how many runs of the simulation will be carried out.
These simulations will run one after the other and each run will be saved in its own subdirectory of the log folder (see Log Files)
User Control Code (Optional)#
The next field prompts you to specify a user module, this is where the you can import your control code (see Custom Control Classes).
If you would just like to run the simulation without any intervention from control code you can leave this field blank.
Click ‘Browse’ and navigate to the python module which contains your control code and select that file.
Now the option menu titled ‘User class name’ should populate with all the classes within your module.
Select the class you would like to run.
Now, when you run the simulation an instance of the class will be constructed and its
process_statefunction will be called after each fire iteration.
Note
Two sample custom control classes have been provided with EMBRS, if you would like to run one of those with your sim, navigate to the ‘examples’ folder and select either ‘vi_controlled_burning.py’ or ‘vii_suppression.py’.
Real-time Visualization#
At the very bottom of the window theere is an option to ‘Visualize in Real-time’.
Check this option if you would like to see a visualization of the simulation as it is running.
It is important to note that the simulation will be slowed down by real-time visualization, therefore it is recommended that the real-time visualization is used for debugging purposes or for verifying setup of a sim.
The sims can be visualized using the visualization tool from their log files after they have finished running, these visualizations tend to be smoother.
Step 4: Run#
Once all the fields in the window are filled out how you would like, simply click ‘Submit’ to run.
If you selected to visualize in real-time the visualization should appear after a few moments.
Otherwise, you should see a progress window as your sim is running.
Once the sim is finished you should see that the log folder you selected has been populated with files.
After a sim has run you will see the initial window again, which you can use to run another sim.