Generating Wind Forecast#
EMBRS maps utilize a wind forecast to model changing wind over time during a simulation. Wind forecasts are specified using a .json file.
Note
Users do not have to specify a wind forecast. If interested in running a simulation in the absence of wind there is an option when running a sim to select no wind.
Wind Forecast Format#
Wind forecasts are required to be submitted as sequences of wind vectors uniformly spaced over time. The time spacing is determined
by the time_step_min field, which is a time step value in minutes defining the frequency of the wind updates.
Each wind vector is represented as an object within the data array. Each object within this array corresponds to the wind conditions
at a specific time step.
The wind vector object consists of two properties: direction and speed_m_s. The direction property represents the wind direction in degrees,
where 0 is due East, and 90, 180, and 270 are North, West, and South respectively. This value is calculated counterclockwise from due East.
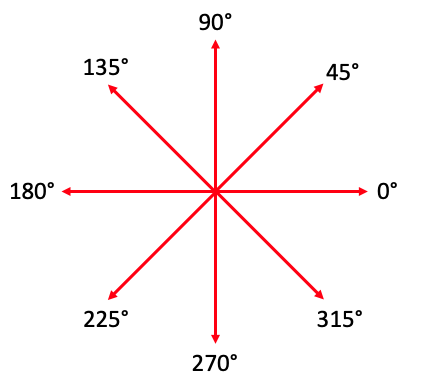
Fig. 1 Wind Directions#
The speed_m_s property signifies the wind speed in meters per second.
The final wind forecast will be a JSON object with the time_step_min field followed by the data field, which is an array of wind vector objects.
The order of these objects in the data array represents the sequence of wind changes over time according to the specified time_step_min.
Here is an example of how a wind forecast can be specified:
{
    "time_step_min": 15,
    "data": [
        {"direction": 315, "speed_m_s": 3},
        {"direction": 0, "speed_m_s": 3},
        ...
    ]
}
In this example, wind vectors are provided every 15 minutes with a speed of 3 m/s, first in the direction of 315 degrees (Northwest), and then 0 degrees (North) and so on. The forecast will continue changing every 15 minutes as specified by each subsequent wind vector in the data array.
Note
The duration of your sim will be limited by the length of the wind forecast, so be sure to include a long enough wind forecast for the length of the sim you’re running.
Wind Forecast Generation Tool#
A wind forecast generation tool has been created to assist users in creating wind forecasts through a GUI. The tool generates a .json file in the format above. Using this tool is completely optional for generating wind forecasts.
Opening the Wind Forecast Generation Tool#
Run the following command in your terminal:
python wind_forecast_generation_tool.py
You should now see a window like this:
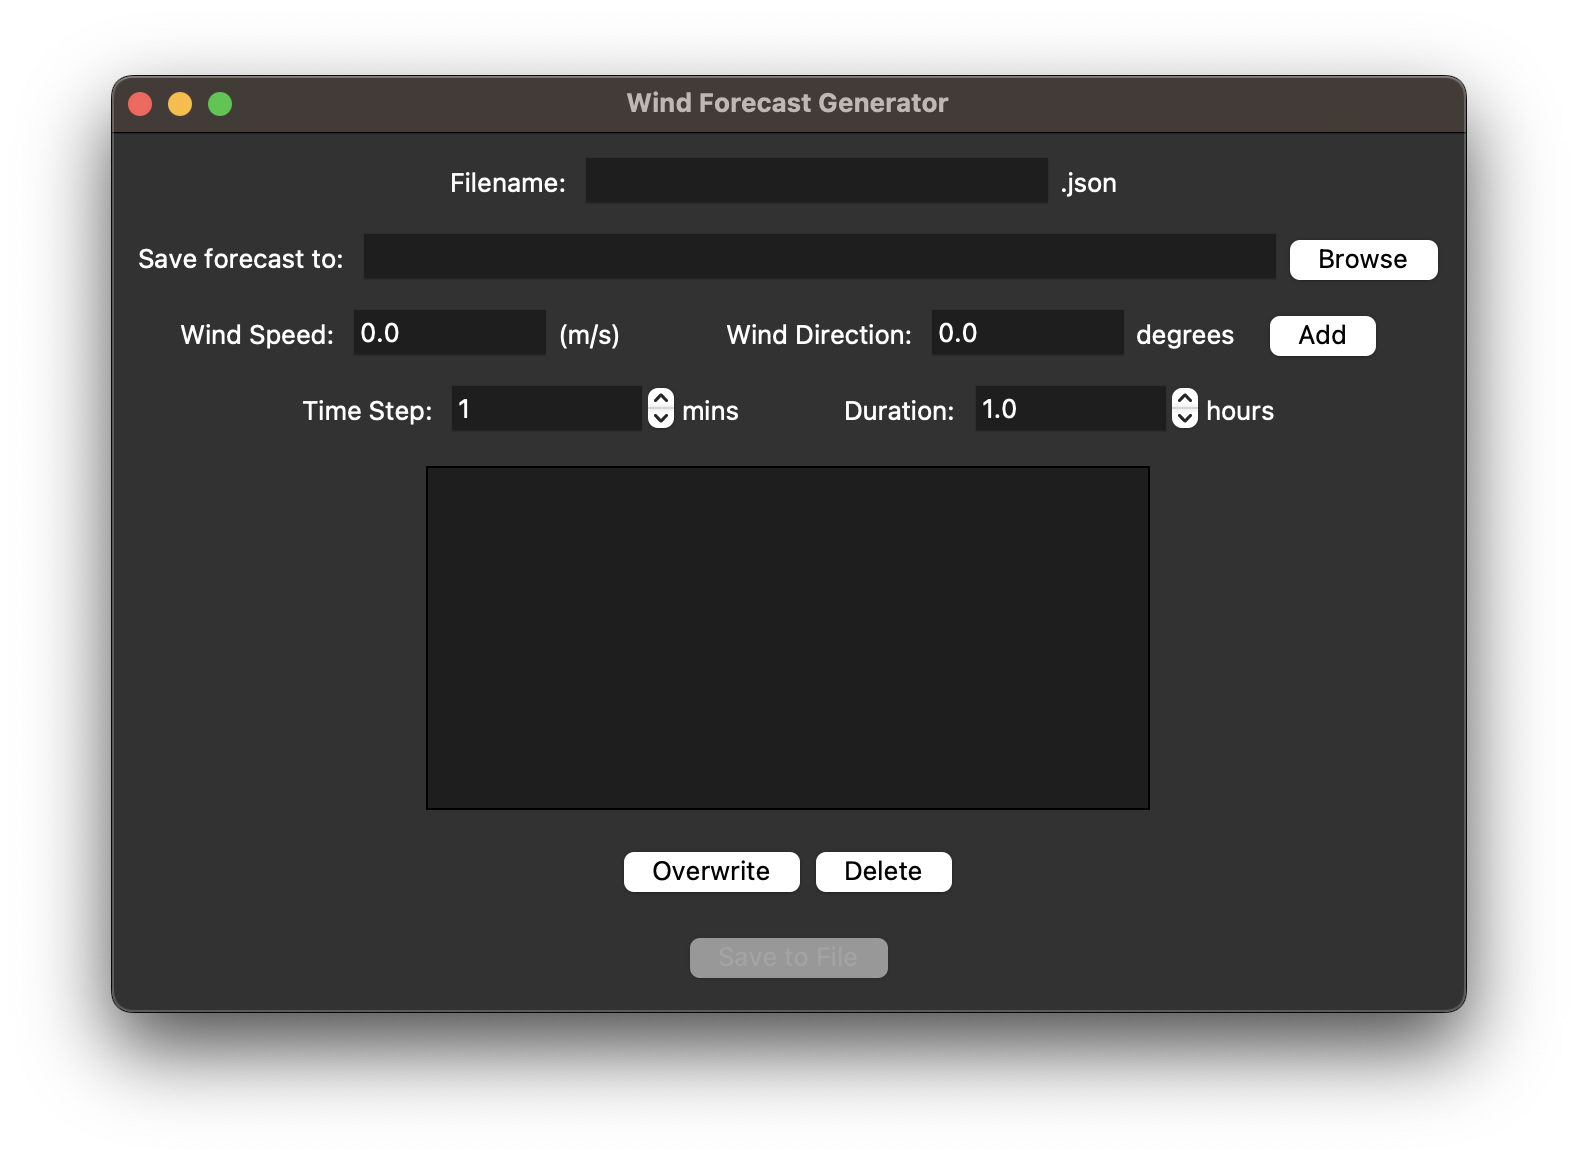
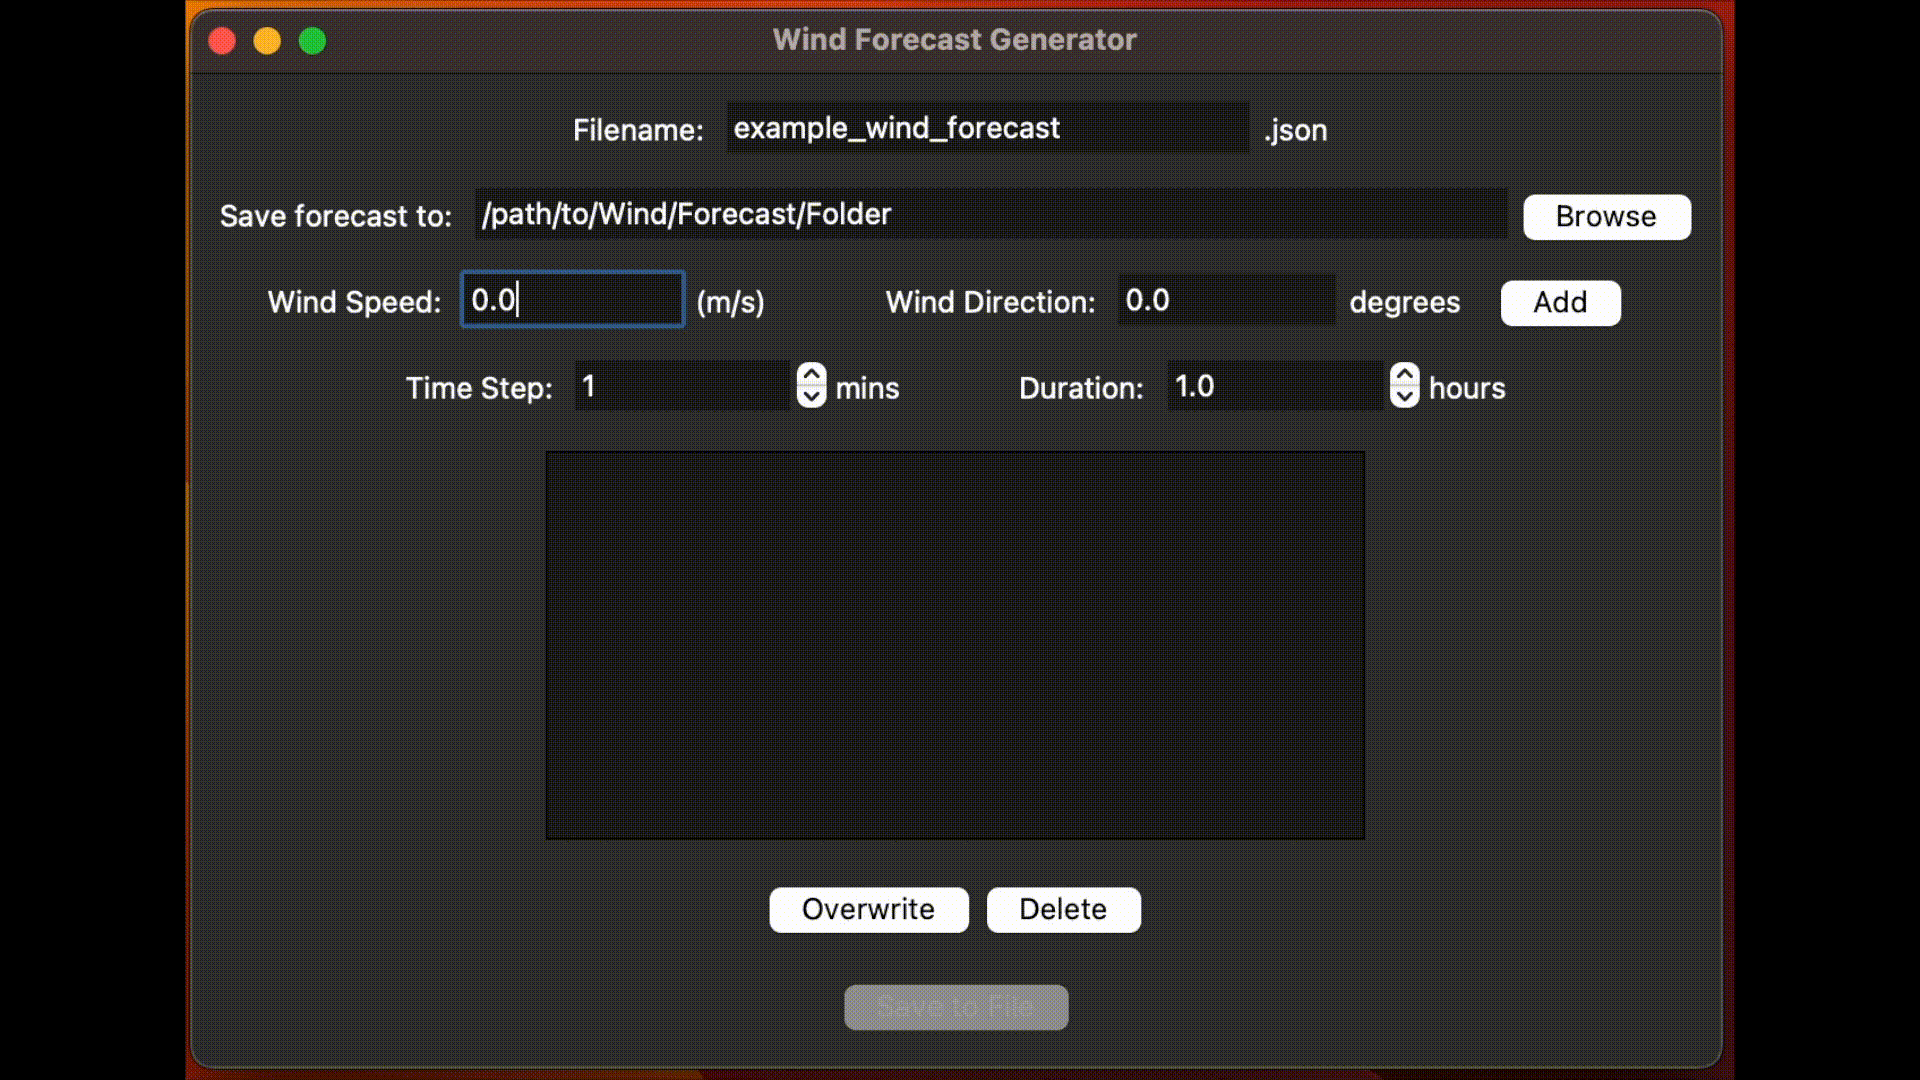
Specifying Filename and Folder Location#
The first field in the forecast generation window prompts to for the filename of the wind forecast, this will be the name of the generatred .json file
The next field prompts you to specify the folder location where the resulting .json file should be saved. Click ‘Browse’ to navigate to the desired folder and select it.
Warning
If you already have a forecast with the filename specified in the selected foler, the tool will overwrite this file.
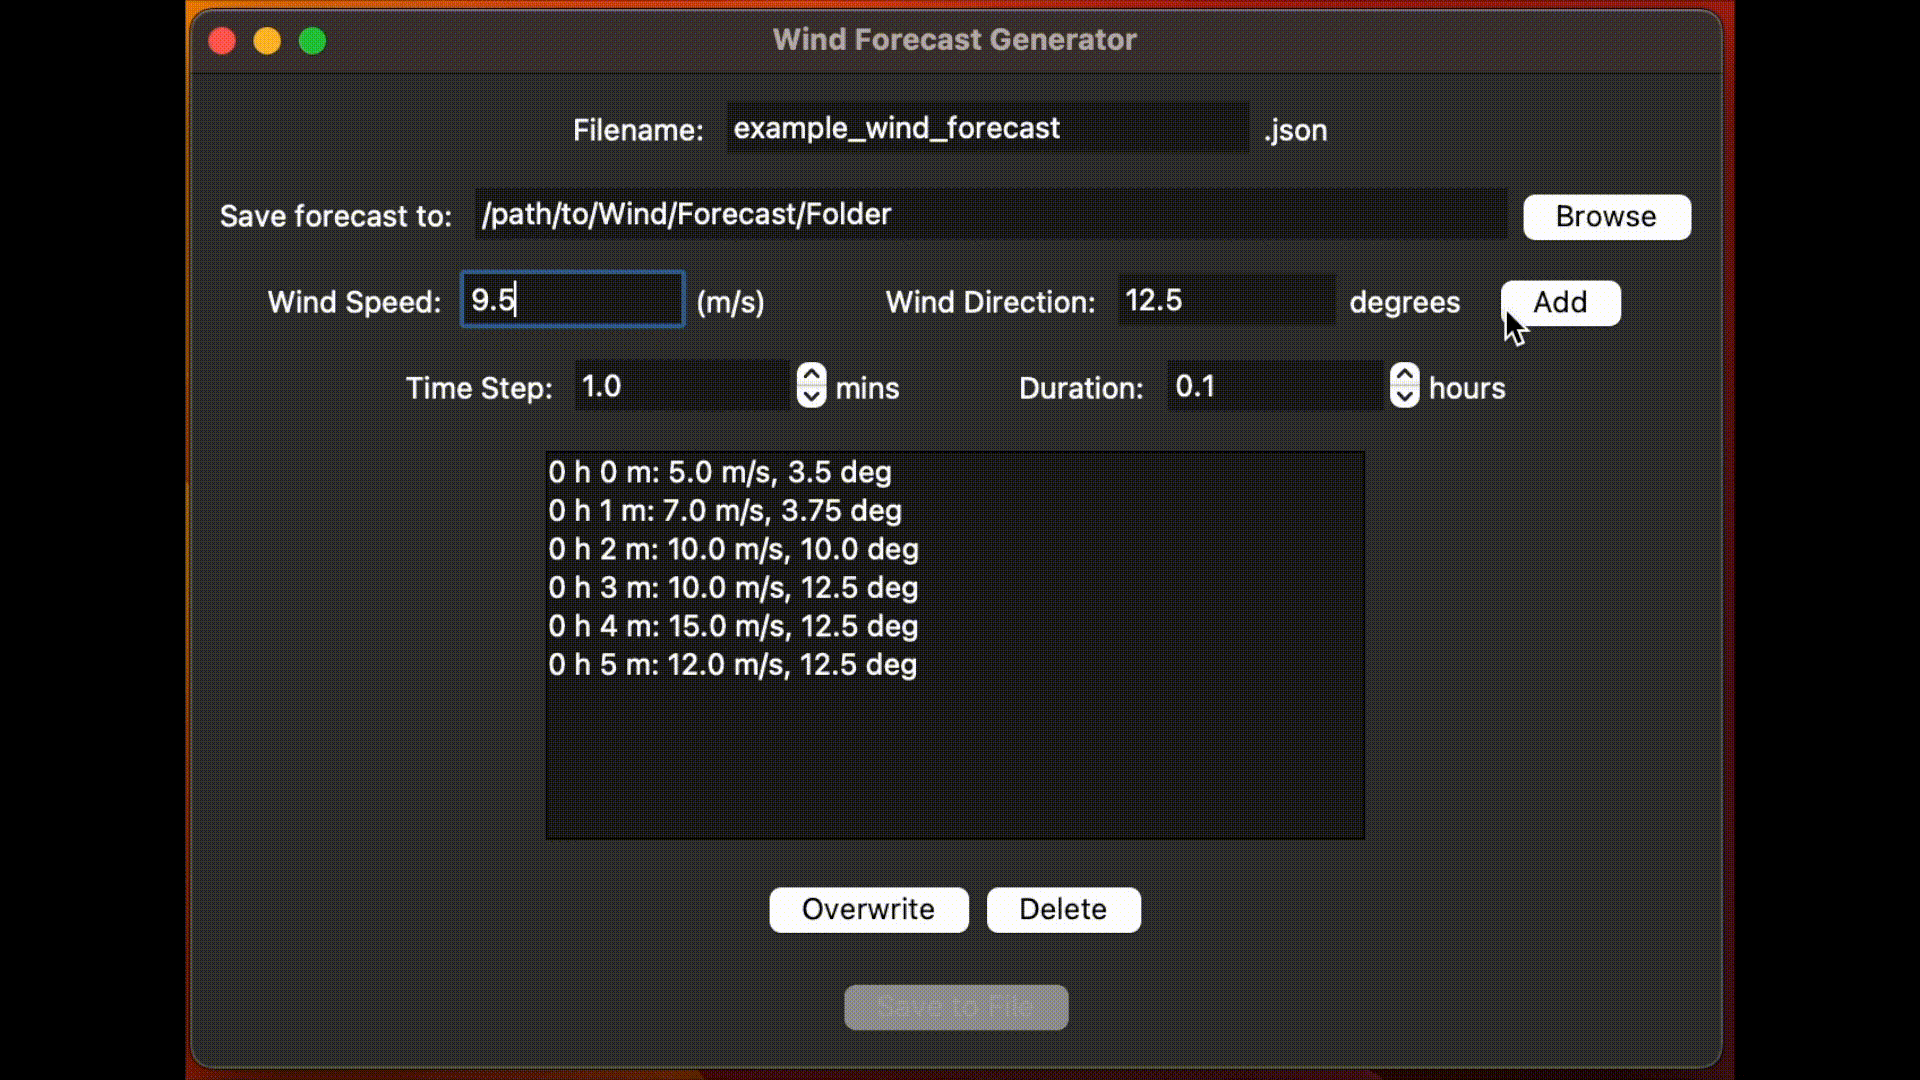
Adding Entries to Forecast#
The next line in the window is where entries are added.
Simply type in the wind speed in units of m/s in the ‘Wind Speed’ field and the wind direction in units of degrees in the ‘Wind Direction’ field.
To add it to the forecast press the ‘Add’ button and you will see your entry added to the wind forecast box.
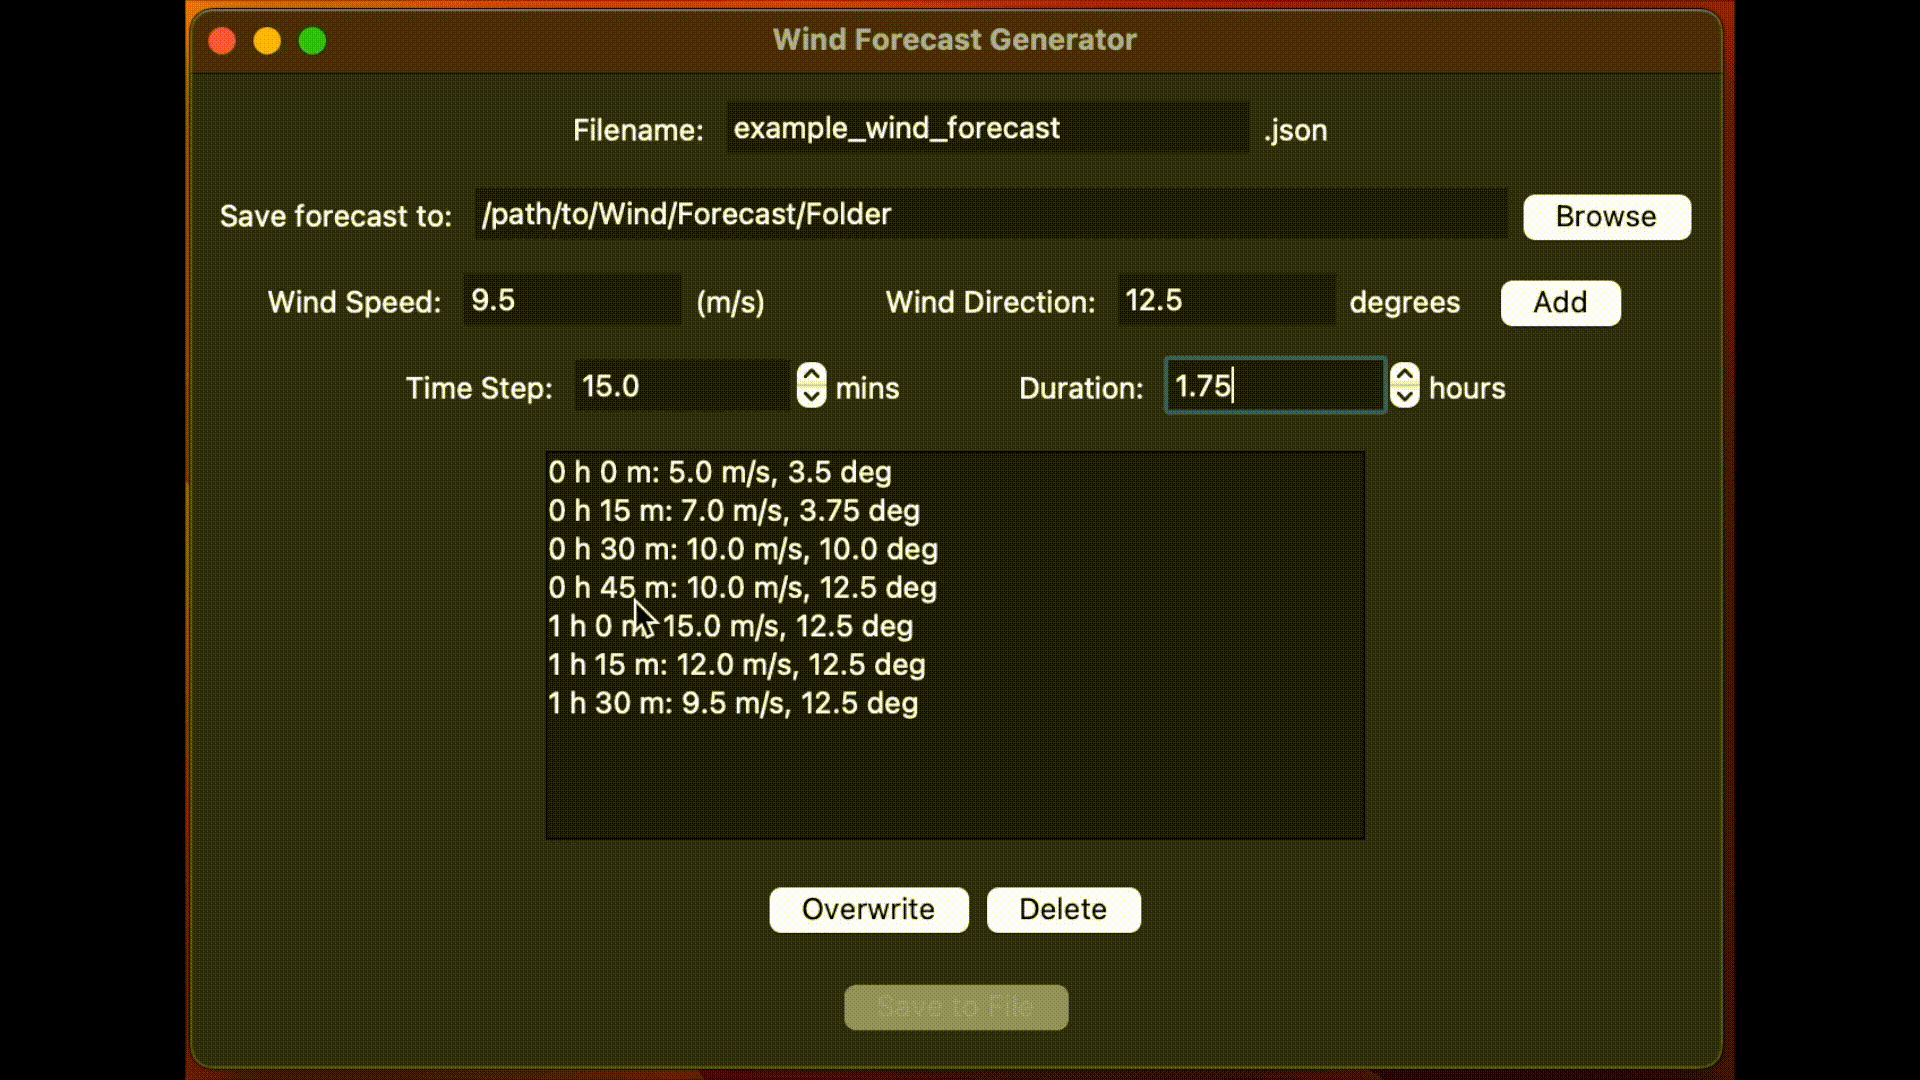
Editing Duration and Time-step#
The next line of fields control the time-step between entries and the total duration of the forecast.
As can be seen by the format above, the duration is not explicitly specified, rather it depends on the number of entries and the time-step, so as one of these values is changed in the GUI the other will change based on the number of entries in the forecast so far.
As more entries are added, the time-step remains constant while the duration is increased for each entry added.
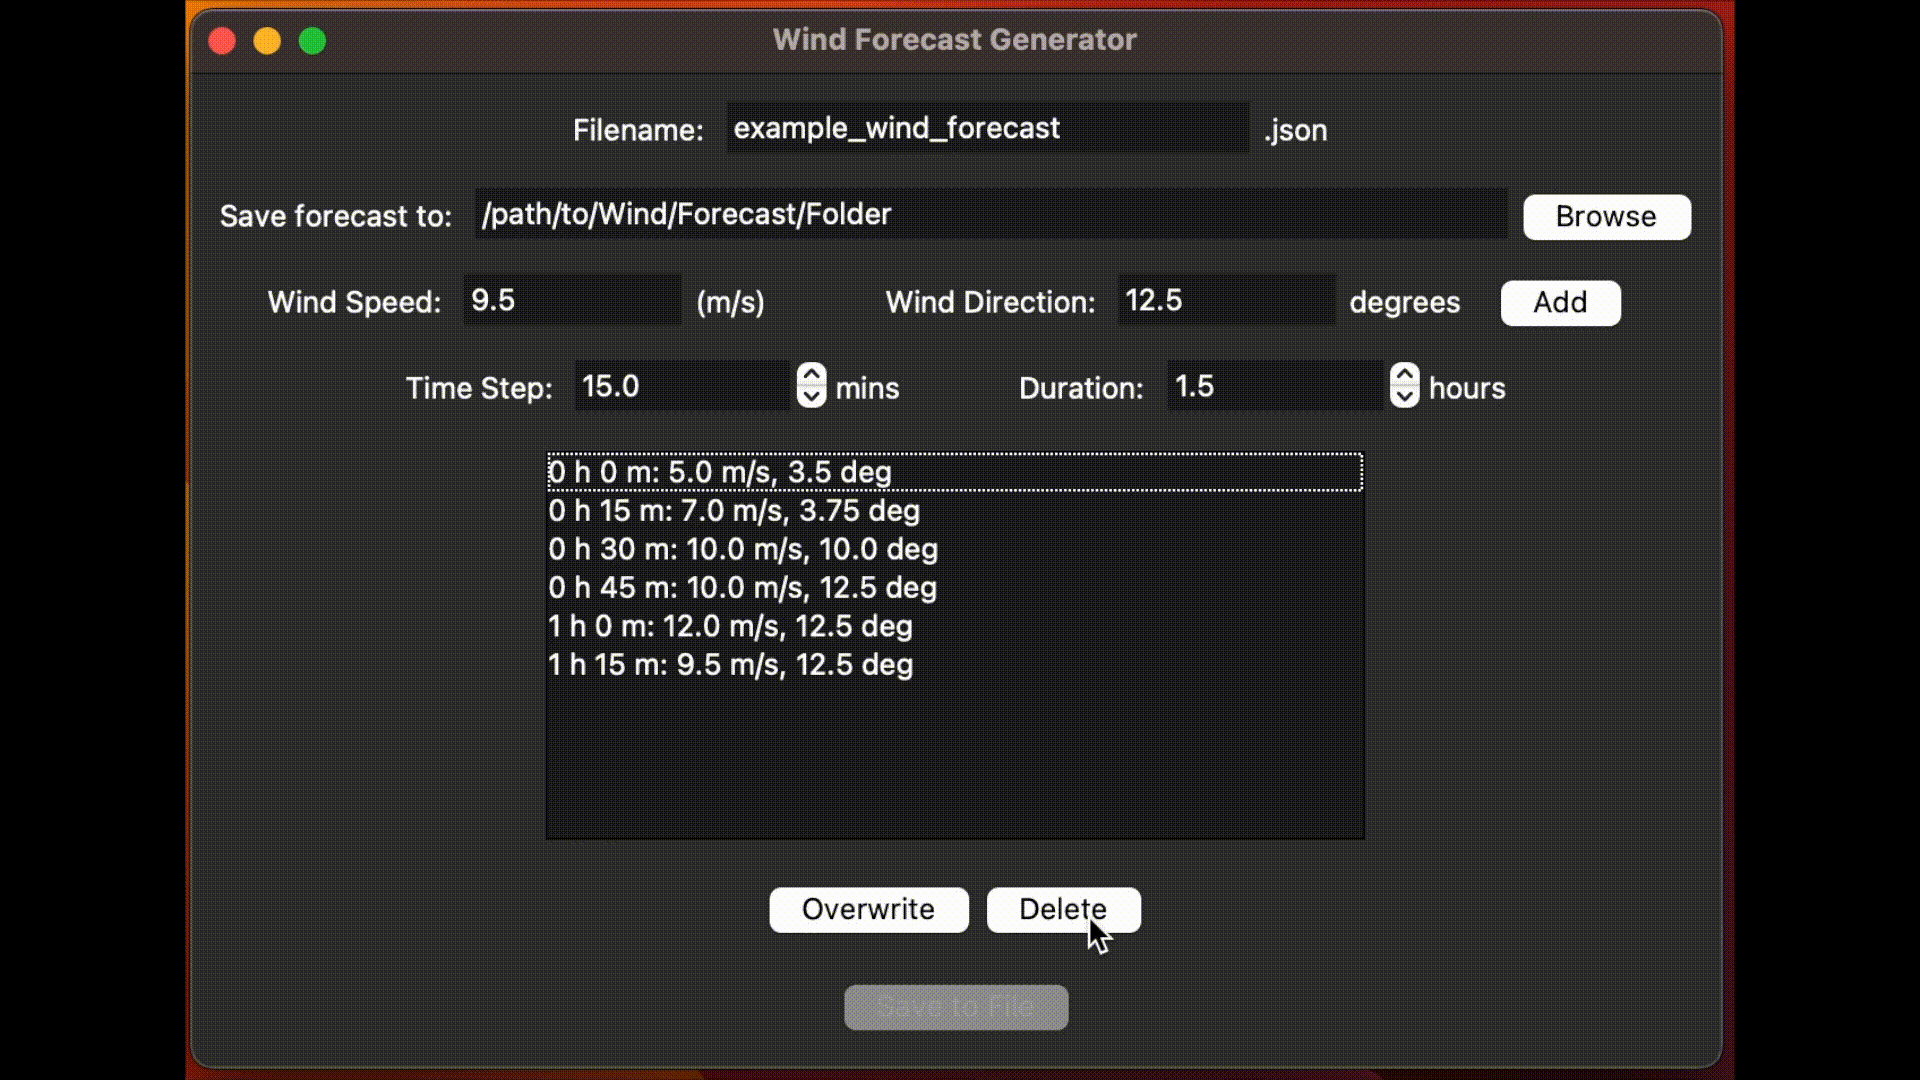
Deleting Forecast Entries#
If you would like to delete an entry from the forecast, simply click on the entry you would like to delete and then press the ‘Delete’ button.
Editing Forecast Entries#
If you would like to edit an existing entry in the forecast, click on the entry, type the values you would like to replace it with in the ‘Wind Speed’ and ‘Wind Direction’ fields and click ‘Overwrite’ to overwrite the selected entry.
Submitting and Saving#
Once the forecast is complete, press the ‘Submit’ button to generate and save the .json forecast file.